As part of our continuing blog series on Errors Inbox (see our previous posts: Collaborate and fix errors quickly with Errors Inbox and Eliminate the network blame game with Network Performance Monitoring and integrate Errors Inbox with Slack).
What is Errors Inbox?
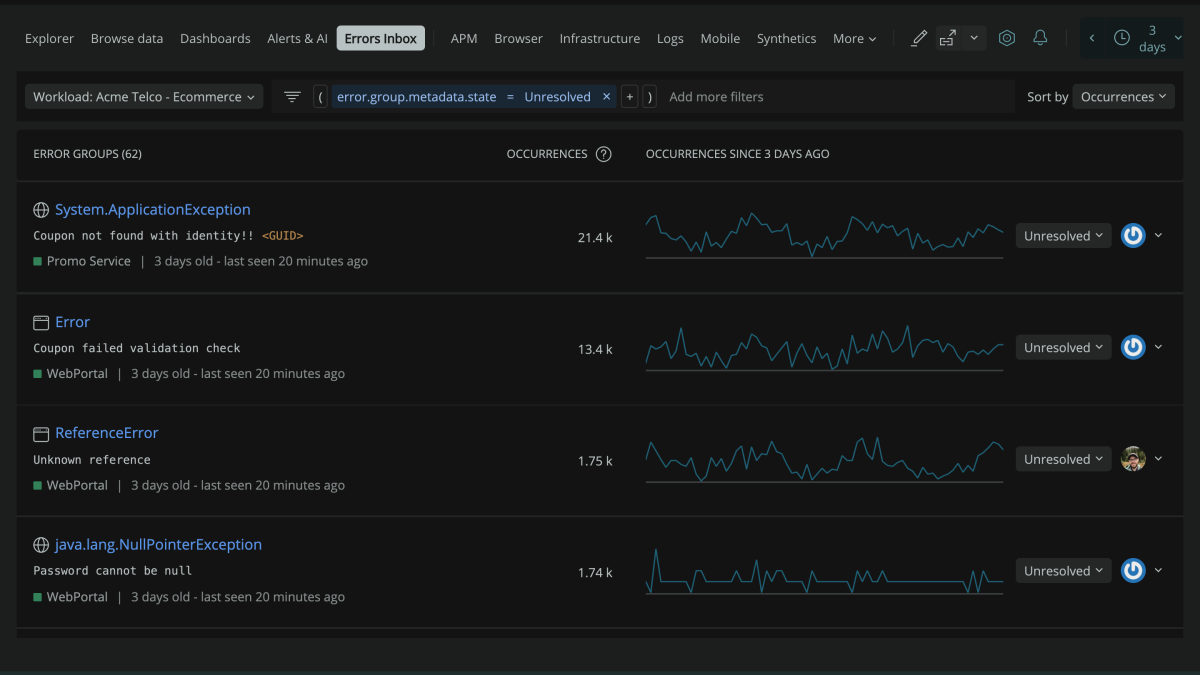
Errors Inbox is an error-tracking solution included with New Relic One’s Full Stack Observability license, including the free tier. Errors Inbox tracks the errors that New Relic is already monitoring, groups them together, and displays them on a single screen allowing engineers to proactively catch and fix errors before they escalate.
Now, you can integrate Errors Inbox to Jira, so you can continue to work and collaborate in the tools you’re already using. With this integration you can:
- Set up templates that allow you to quickly create a Jira ticket that contains the error details and links directly to the stack trace and APM for easy debugging.
- Additionally, when a Jira ticket is created, the link to that ticket is stored alongside the associated Error Group metadata for a period of time. If there's a regression and a previously fixed error comes back to haunt you, you can quickly see the context around the original solution. You won't be trying to remember if a familiar-looking error is the same error you previously fixed.

How to set up an integration with Jira
No additional applications are needed to set up Jira. To set up Jira, follow these steps below:
In Errors Inbox, click on the Jira integration icon next to the error group you want to connect to Jira.
If you don’t already have a connection with Jira, click Add JIRA Workspace.
You need to add the following details to set up the Jira Workspace:
- Name of the destination: Provide a descriptive name to easily identify the workspace.
- URL: The URL to the specific Jira environment.
- Username: Your Jira username.
- API Token: Your generated Jira API Token.
Click Test connection before saving to ensure that your details are correct.
Next, set up a template. Templates determine what information will be sent to Jira. In Errors Inbox, click the Jira icon next to an error group to see the Jira destination you created, then click the Add New Template link in the Jira destination.
Your template needs to include:
- Jira destination: Your Jira endpoint.
- Project: The Jira project where you want to add the ticket.
- Issue Type: The type of ticket issue you want to create.
- Required Fields: New Relic fetches the ticket schema from Jira and will dynamically display all required fields for that ticket type. Typical fields include Summary, Description, and Reporter. We auto-populate a suggested template for you, but you can modify the contents as you see fit. You can also use our dynamic templating by typing a `{{` to bring up a list of variables available for populating dynamic content into ticket fields.
- Reporter: Note that we don’t currently support dynamic selection of the reporter for ticket creation, so we recommend using a shared Jira user for automations/bots when setting up your templates.
- Additional Fields (Optional): New Relic automatically identifies additional fields to send to Jira. Click Add another field to see the full list of available fields and add any additional fields you think should be part of the template.
Click Send test notification to preview what the ticket looks like in Jira. Once you’re satisfied, click Update message to save the template. Note that a test notification will create a Jira ticket in your Jira Workspace.
Now anyone who has access to this Errors Inbox can start creating Jira tickets in two clicks while triaging errors.
Errors Inbox notifications in Jira include a link to the error details in New Relic’s Errors Inbox and a link to the entity throwing the error. Using the `{{` variables while setting up your templates allows you to include additional information about the error.
Ready to learn more about New Relic and how we collaborate with customers? See how we've collaborated with ZenHub to do so.
Next steps
Start your Errors Inbox Journey today
There’s a lot more to learn about New Relic Errors Inbox. Watch this demo video or read our documentation. Want to see Errors Inbox in action? See how Beyond Finance uses Errors Inbox to fix errors quickly
If you’re not already a New Relic customer, then request a demo or sign up for a free trial today.
The views expressed on this blog are those of the author and do not necessarily reflect the views of New Relic. Any solutions offered by the author are environment-specific and not part of the commercial solutions or support offered by New Relic. Please join us exclusively at the Explorers Hub (discuss.newrelic.com) for questions and support related to this blog post. This blog may contain links to content on third-party sites. By providing such links, New Relic does not adopt, guarantee, approve or endorse the information, views or products available on such sites.


