Delivering a new feature involves coordination between various opinionated teams and their timelines. Teams also need to decide which customers should have access to the feature during beta, early access, and limited release before it reaches general availability.
To address such concerns, development teams typically use feature flags to “safely activate or deactivate features for experimentation, release, testing, operations, and more,” according to Split.
Split is a feature delivery platform that allows you to effectively manage change in complex environments with feature flags, and we recently partnered with them to develop an integration for a more streamlined approach to feature flagging. Our goal was to give developers faster visibility into the impact of the code that they feature flag. To do this, the Split integration annotates New Relic transactions with a feature flag context. This makes it possible, using NRQL, to correlate application metrics with feature flag changes.
In this post, we’ll demonstrate the integration with an example Java application (called Origami Portal) that’s running the Split Java SDK and has been instrumented with the New Relic Java agent. We will also take a look at the New Relic One application we built to support the integration between our two platforms. (See the embedded video at the end of this post.)
How Split works
If you’re a developer, chances are you’ve released thousands of features using feature flags. A feature flag (called a split) is a piece of conditional code that allows a software development team to separate code deployment from feature release. By using conditional code you can create two (or more) treatments to represent two (or more) different customer experiences.
For example: With some conditional code, you can represent when a new feature is on and when it is off. You can deploy the code darkly and gradually expose customers to the treatment that is on. When your customer is evaluated for this split, they generate an impression representing which treatment they saw. You can append this impression information to New Relic transaction-level data for deeper analysis.
Ready for more? Learn more about using feature flags in a simple React application.
Configure the New Relic integration in Split’s SDK
You can configure the New Relic integration in your Split SDK integration settings. For full details, see Split’s Java SDK documentation.
Using Split’s Java SDK, we’ll implement the integration in our Origami Portal application as a synchronous impression listener. As impressions are created, the listener sends them to New Relic:
SplitClientConfig config = SplitClientConfig.builder()

  .integrations(

          IntegrationsConfig.builder()

                  .newRelicImpressionListener()

                  .build())

  .build();

SplitFactoryBuilder.build("<API_TOKEN>").client();
If the Split SDK detects the New Relic agent in the classpath, the integration will be enabled. If the agent is not detected, the following error will be displayed in the application logs (if logging is enabled):
WARN [main] (IntegrationsConfig.java:72) - New Relic agent not found. Continuing without it
View transaction data in New Relic by treatment
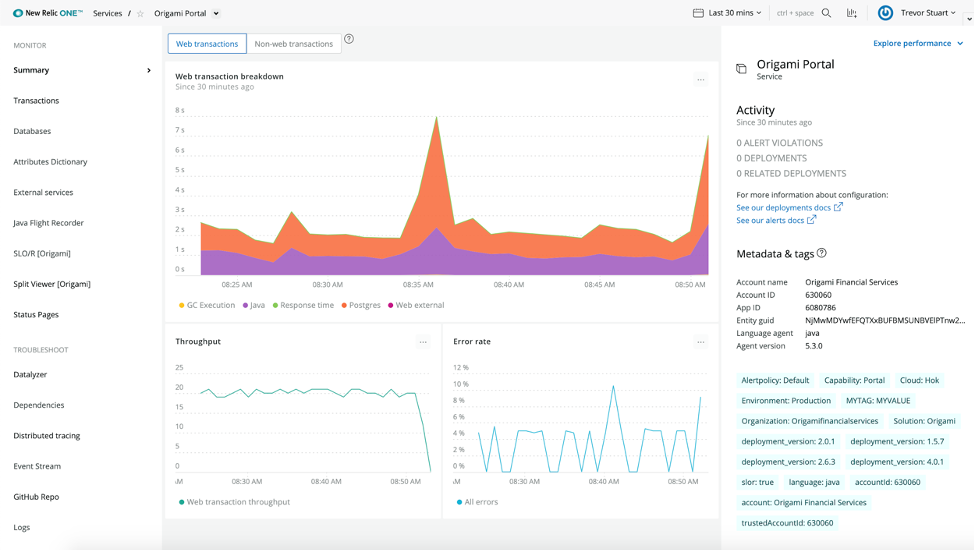
Let’s take a look at our Origami Portal application in New Relic.

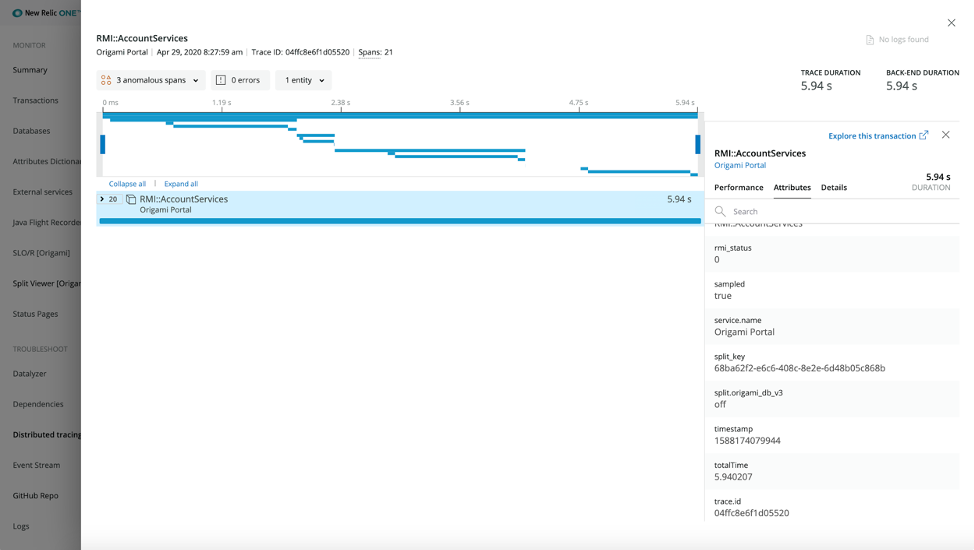
In New Relic distributed tracing we can see how the Split SDK feature flag impression information is appended to New Relic transactional data.
When we click on any transactional data for our application, we see that Split appends the data under the Attributes section. With each transaction, new columns are automatically created for each split evaluated, with the value for the transaction representing the treatment received. A column including the key used in the split evaluation, traditionally userIDs or AccountID, will be displayed in the column split_key.
| Column header | Column value | Description |
|---|---|---|
Column headersplit. |
Column valueTreatment | DescriptionSplit name and treatment received. |
Column headersplit_key |
Column valueKey | DescriptionKey used in the evaluation of the splits. |
To see all transactions where the split_key is not null, for instance, we can use the following NRQL query:
SELECT * FROM Transaction WHERE appName = 'Origami Portal' AND split_key IS NOT NULL since 1 hour ago

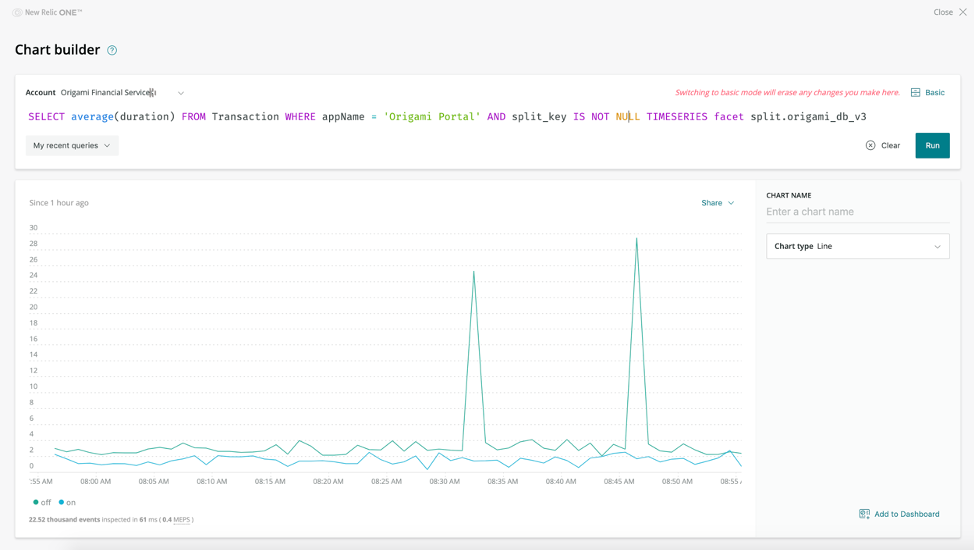
With Split impressions added to the transaction level data in New Relic, we can query our data to understand changes in performance for our users with different treatments.
The following dashboard shows Origami Portal’s response time faceted by the Split treatment for a particular split.

Once your Split feature flag data is in New Relic, you have the power of NRDB at your fingertips—you visualize the data in custom dashboards or build custom applications on New Relic One to add business context to your feature flag data.
Using Split in a New Relic One application
After configuring your environment, you’ll be able to use Split with New Relic One. In the video below, you can see the New Relic One integration that we built that combines New Relic and Split information in a single view. The integration allows you to invoke behavior in the Split platform. In this example, we just “kill” (rollback) the split.
We’re looking to make this experience even simpler and we’d love your feedback. Contact DECO@newrelic.com to learn more about our integrations and efforts to extend New Relic One.
Interested in a deeper dive? With feature flags via Split, you can use the power of New Relic to “close the loop” for feature rollouts. By pushing feature flagging metadata into New Relic, you can immediately understand the impact of a feature change across any metric you care about, in real time.
The views expressed on this blog are those of the author and do not necessarily reflect the views of New Relic. Any solutions offered by the author are environment-specific and not part of the commercial solutions or support offered by New Relic. Please join us exclusively at the Explorers Hub (discuss.newrelic.com) for questions and support related to this blog post. This blog may contain links to content on third-party sites. By providing such links, New Relic does not adopt, guarantee, approve or endorse the information, views or products available on such sites.


