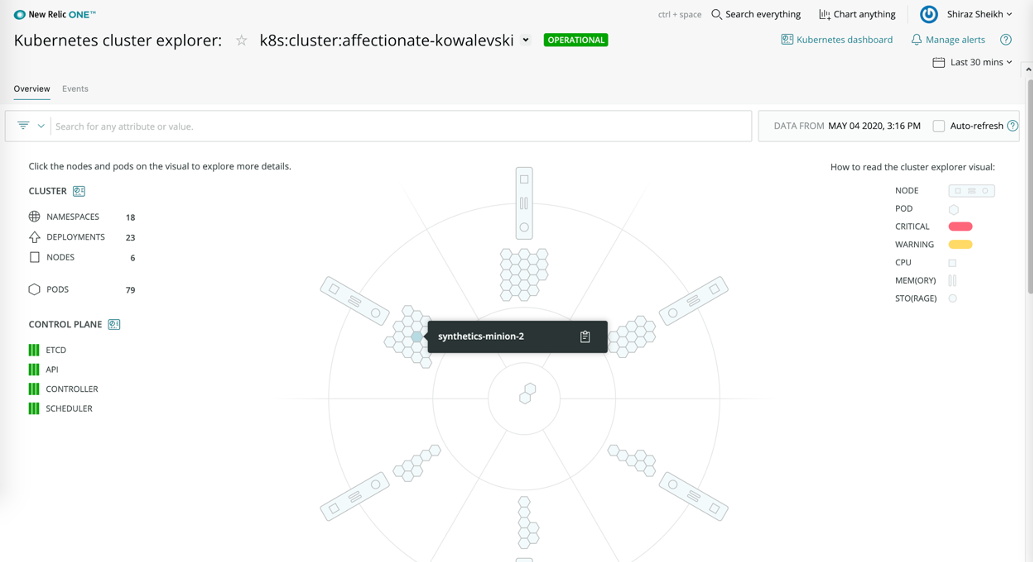
Kubernetes helps increase the velocity of deployments, improve infrastructure durability, and automate the building, running, and maintaining of applications throughout your production environments. To optimize performance, New Relic released the Kubernetes cluster explorer so you can quickly understand the health of your rapidly-scaling environments of pods, containers, and applications.
Synthetic testing and monitoring allows you to proactively test the availability and performance of your critical endpoints. We launched containerized private minions to help you easily incorporate uptime monitoring into the build process as you tested employee facing applications behind the firewall.
For these reasons, we’re excited to announce that New Relic users can now add private minions into their Kubernetes environments. This new feature offers our customers the ability to automatically deploy synthetic private locations and run monitors alongside them as part of a Kubernetes deployment.
In short, New Relic Synthetics is meeting you where you are—within the systems you’re using—to automate and manage your build and deployment processes. You now have an easier way to automate and ensure that your critical endpoints are available and performant as you rapidly change and scale your systems.
Benefits of connecting New Relic Synthetics and Kubernetes
We’ve made Synthetics compatible with your Kubernetes orchestration software, enabling you to use Kubernetes to monitor availability and performance from Synthetic’s private locations, such as those behind a firewall or not exposed to the public.
Leveraging Kubernetes to automate and manage these private locations helps developers save time and reduce manual efforts. Use the private minion Helm charts to easily include a private location in your next Kubernetes deployment. Once the location is created, add it to your existing Synthetics monitors, and you’ll be up and running in minutes.
Leave the scaling and reliability concerns to Kubernetes. We have designed our private minion so that Kubernetes has full control over the resources and containers. The Helm charts allow you to use our recommended default resources or provide you with the ability to define the resource allocation per synthetics check. This helps you focus more on remediating latency and improving reliability, and less on configuration and instrumentation.
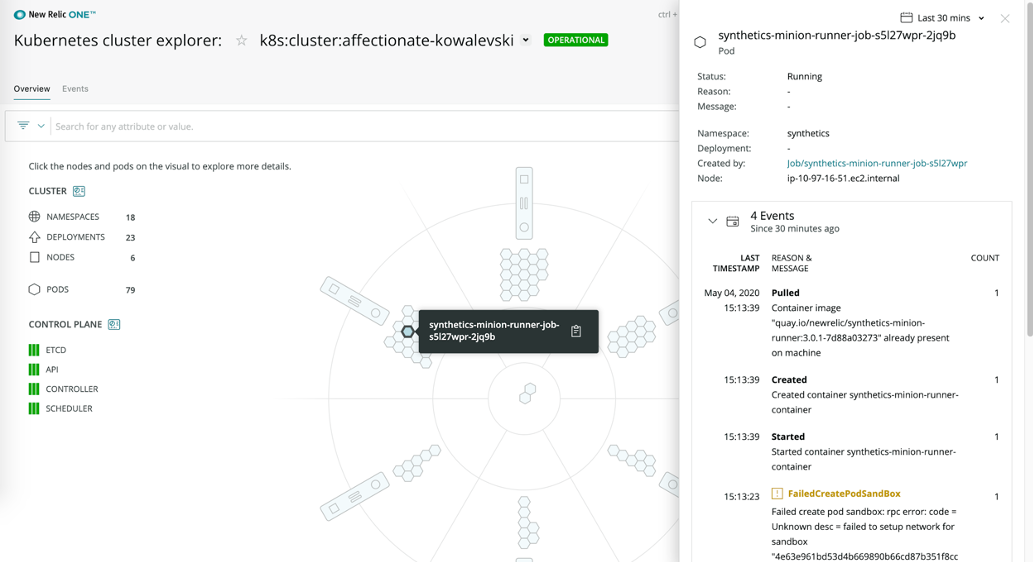
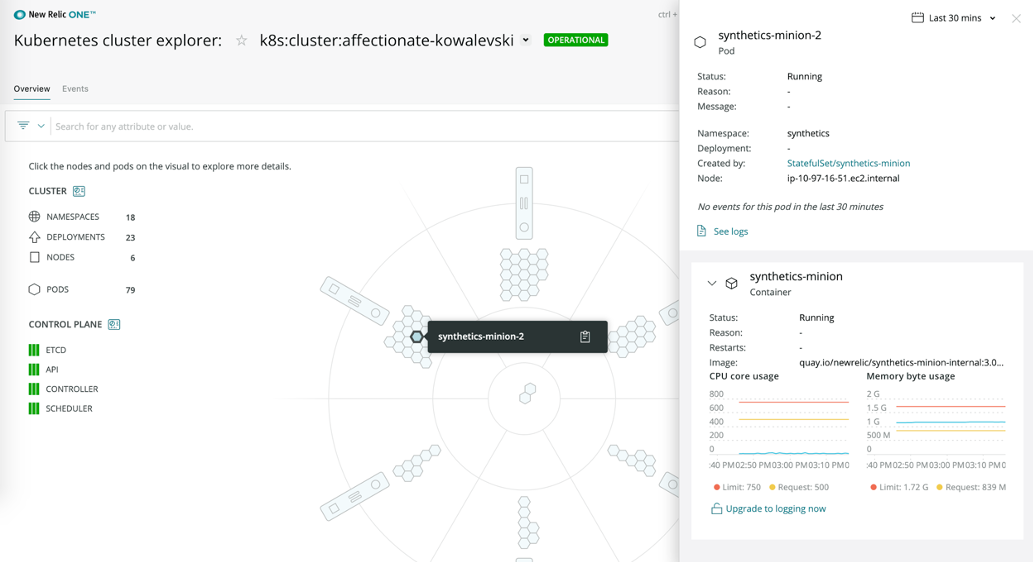
Even more, we offer additional visibility of the Kubernetes host itself. Using the New Relic Kubernetes cluster explorer you can quickly see the health and status of your private location, alongside the other containers running in your Kubernetes environment. You can also easily view stats and errors about your private location, and understand how widespread issues might be across other applications running on the same cluster.
This way, New Relic customers leveraging Kubernetes can simultaneously deploy a new version of their application alongside APM and Synthetics. The feature makes it easy by leveraging Helm charts on Kubernetes, which automatically provide reference configurations, steps for deployment, and resource requirements.
If an application experiences issues and is re-deployed per the Kubernetes automated deployment process, Synthetics is also redeployed with no additional configuration needed.
How to get started with New Relic Synthetics and Kubernetes
- Confirm you meet the Kubernetes container orchestration system environment requirements.
- Locate your private location key. Go to synthetics.newrelic.com > Private locations.In the Private locations index, locate the private location you want your CPM to be assigned to. Note the key associated with the private location with the key icon.
- Set up a namespace for the CPM in your Kubernetes cluster:
kubectl create namespace YOUR_NAMESPACE
- Copy the Helm charts from the New Relic Helm repo.
- If you are copying the charts for the first time:
helm repo add YOUR_REPO_NAME https://helm-charts.newrelic.com - If you previously copied the Helm charts from the New Relic Helm repo, then get the latest:
helm repo update
- If you are copying the charts for the first time:
- Install the CPM using the Helm charts:
- For a fresh installation of the CPM:
helm install YOUR_CPM_NAME YOUR_REPO_NAME/synthetics-minion -n YOUR_NAMESPACE --set synthetics.privateLocationKey=YOUR_PRIVATE_LOCATION_KEY
- To update an existing CPM installation:
helm update YOUR_CPM_NAME YOUR_REPO_NAME/synthetics-minion -n YO
- For a fresh installation of the CPM:
Next, connect into New Relic’s Kubernetes cluster explorer.
To monitor the CPM using the Kubernetes cluster explorer
- Locate your license key.
- Find your cluster name:
kubectl config current-context
- Confirm you have
kube-state-metricsinstalled:
kubectl get deployment --all-namespaces | grep kube-state-metrics
- Select the cluster for the agent installation:
kubectl config set-cluster DESIRED_CLUSTER
- Add the Helm charts:
helm repo add stable https://kubernetes-charts.storage.googleapis.com/
- Install the Kubernetes integration using the Helm charts, depending on whether you're using Helm 2 or Helm 3
- Look up the Synthetics minion in your Kubernetes cluster explorer.
For employee-facing applications, or any application not exposed to the public or behind the firewall, availability, and performance is critical to efficiency. Kubernetes orchestration software allows teams to quickly automate change and more easily manage the build and deploy process. Incorporating synthetic monitoring into Kubernetes software gives software engineers the ability to easily detect, isolate, and communicate problems of availability and performance for critical application endpoints.
To learn more about how you can enable teams to proactively detect and resolve incidents faster by finding problems before they impact customers, check out New Relic Synthetics.
The views expressed on this blog are those of the author and do not necessarily reflect the views of New Relic. Any solutions offered by the author are environment-specific and not part of the commercial solutions or support offered by New Relic. Please join us exclusively at the Explorers Hub (discuss.newrelic.com) for questions and support related to this blog post. This blog may contain links to content on third-party sites. By providing such links, New Relic does not adopt, guarantee, approve or endorse the information, views or products available on such sites.


