This is part one of a five-part series on Kubernetes Fundamentals where we’ll show you how to manage cluster capacity with requests and limits Check back for new parts in the following weeks.
Kubernetes is a system for automating containerized applications. It manages the nodes in your cluster, and you define the resource requirements for your applications. Understanding how Kubernetes manages resources, especially during peak times, is important to keep your containers running smoothly.
In this post, we’ll take a look at how Kubernetes manages CPU and memory using requests and limits.
What are Kubernetes requests?
Kubernetes requests are fundamental components in Kubernetes resource management, serving as the cornerstone for ensuring efficient and stable operations in containerized environments. When you define a request for a container in a Kubernetes Pod, you are essentially specifying the minimum amount of CPU or memory resources that must be allocated for that container to run effectively. This mechanism is crucial for the Kubernetes scheduler, which uses these requests to make informed decisions about where to place Pods within the cluster. By setting appropriate requests, Kubernetes can balance the load across nodes, preventing any single node from being overwhelmed and ensuring that each container has the resources it needs to perform as expected. This not only optimizes resource utilization across the cluster but also plays a vital role in maintaining application performance and reliability, especially in environments with varying workloads and resource demands.
What are Kubernetes limits?
Kubernetes limits are key parameters set within the configuration of a container in a Kubernetes environment, defining the maximum amount of CPU and memory resources that the container is allowed to use. These limits are crucial for preventing any single container from monopolizing the resources of a node, thereby ensuring a balanced and fair resource distribution among all the containers in the cluster. When a container tries to exceed its specified limit, Kubernetes employs control measures: for memory, the container can be terminated if it exceeds the limit, leading to a restart, often with an 'Out of Memory' error; for CPU, exceeding the limit results in throttling, where the container is allowed to use more CPU than its specified limit but with diminished resources. This mechanism is essential in maintaining the overall health and efficiency of the Kubernetes cluster, especially in complex environments where multiple containers are competing for resources. By judiciously setting limits, administrators can optimize the performance of each container, prevent resource starvation of other containers, and maintain the stability and reliability of their applications.
Kubernetes requests vs limits
Kubernetes requests and limits are both critical for resource management within a cluster. Requests define the minimum resources a container needs, ensuring stable performance by allocating sufficient CPU and memory. Limits set the maximum resources a container can use, preventing any single container from using excessive resources and affecting others. Properly balancing these two helps maintain cluster health: requests avoid resource starvation for efficient operation, while limits prevent resource hogging, ensuring overall system stability. The right configuration of requests and limits is vital for optimizing both individual container performance and the overall functionality of the Kubernetes environment.
How Kubernetes requests and limits work together
Every node in a Kubernetes cluster has an allocated amount of memory (RAM) and computational power (CPU) that can be used to run containers.
How do requests and limits impact pod scheduling?
Kubernetes scheduler uses the requested resources to find a suitable node for a pod. If a node can't fulfill the resource request, the pod may remain pending. Limits, on the other hand, prevent a container from consuming more resources than allocated.
What is the impact of not setting requests and limits?
Without setting requests and limits, Kubernetes may not efficiently allocate resources, leading to potential resource contention and unpredictable pod behavior. It is recommended to set them to ensure stable and predictable performance.
Before we get started, we wanted to identify some key components of Kubernetes containers.
Defining “pods” in Kubernetes
Kubernetes defines a logical grouping of one or more containers into Pods. Pods, in turn, can be deployed and managed on top of the nodes. When you create a Pod, you normally specify the storage and networking that containers share within that Pod. The Kubernetes scheduler will then look for nodes that have the resources required to run the Pod.
Why you need parameters for your requests and limits
To help the scheduler, we can specify a lower and upper RAM and CPU limits for each container using requests and limits. These two keywords enable us to specify the following:
- By specifying a request on a container, we are setting the minimum amount of RAM or CPU required for that container. Kubernetes will roll all container requests up into a total Pod request. The scheduler will use this total request to ensure the Pod can be deployed on a node with enough resources.
- By specifying a limit on a container, we are setting the maximum amount of RAM or CPU that the container can consume. Kubernetes translates the limits to the container service (Docker, for instance) that enforces the limit. If a container exceeds its memory limit, it may be terminated and restarted, if possible. CPU limits are less strict and can generally be exceeded for extended periods of time.
Let’s see how requests and limits are used.
Setting Kubernetes CPU requests and limits
Requests and limits on CPU are measured in CPU units. In Kubernetes, a single CPU unit equals a virtual CPU (vCPU) or core for cloud providers, or a single thread on bare metal processors.
When CPU fractions might make sense
Under certain circumstances, one full CPU unit can still be considered a lot of resources for a container, particularly when we talk about microservices.
This is why Kubernetes supports CPU fractions. While you can enter fractions of the CPU as decimals — for example, 0.5 of a CPU — Kubernetes uses the “millicpu” notation, where 1,000 millicpu (or 1,000m) equals 1 CPU unit.
How Kubernetes CPU requests work
When we submit a request for a CPU unit, or a fraction of it, the Kubernetes scheduler will use this value to find a node within a cluster that the Pod can run on. For instance, if a Pod contains a single container with a CPU request of 1 CPU, the scheduler will ensure the node it places this Pod on has 1 CPU resource free. For a Docker container, Kubernetes uses the CPU share constraint to proportion the CPU.
If we specify a limit, Kubernetes will try to set the container's upper CPU usage limit. As mentioned earlier, this is not a hard limit, and a container may or may not exceed this limit depending on the containerization technology. For a Docker container, Kubernetes uses the CPU period constraint to set the upper bounds of CPU usage. This allows Docker to restrict the percentage of runtime over 100 milliseconds the container can use.
Below is a simple example of a Pod configuration YAML file with a CPU request of 0.5 units and a CPU limit of 1.5 units.
apiVersion: v1

kind: Pod

metadata:

  name: cpu-request-limit-example

spec:

  containers:

  - name: cpu-request-limit-container

    image: images.example/app-image

    resources:

      requests:

        cpu: "500m"

      limits:

        cpu: "1500m"
This configuration defines a single container called “cpu-request-limit-container” with the image limits specified in the resources section. In that section, we specify our requests and limits. In this case, we are requesting 500 millicpu (0.5 or 50% of a CPU unit) and limiting the container to 1500 millicpu (1.5 or 150% of a CPU unit).
Setting Kubernetes memory requests and limits
Memory requests and limits are measured in bytes, with some standard short codes to specify larger amounts, such as Kilobytes (K) or 1,000 bytes, Megabytes (M) or 1,000,000 bytes, and Gigabytes (G) or 1,000,000,000 bytes. There is also power of 2 versions of these shortcuts. For example, Ki (1,024 bytes), Mi, and Gi. Unlike CPU units, there are no fractions for memory as the smallest unit is a byte.
How memory limits work in Kubernetes
The Kubernetes scheduler uses memory requests to find a node within your cluster that has enough memory for the Pod to run on. Memory limits work in a similar way to CPU limits except they are enforced in a more strict manner. If a container exceeds a memory limit, it might be terminated and potentially restarted with an “out of memory” error.
Example of Pod configuration with memory limits
The simple example of a Pod configuration YAML file below contains a memory request of 256 megabytes and a memory limit of 512 megabytes.
apiVersion: v1

kind: Pod

metadata:

  name: memory-request-limit-example

spec:

  containers:

  - name: memory-request-limit-container

    image: images.example/app-image

    resources:

     requests:

       memory: "256M"

     limits:

       memory: "512M"
This configuration defines a single container called “memory-request-limit-container” with the image limits specified in the resources section. We have specified the memory request of 256M, and we’ve limited the container to 512M.
How to set Kubernetes limits via namespaces
If you have several developers, or teams of developers, working within the same large Kubernetes cluster, a good practice is to set common resource requirements to ensure resources are not consumed inadvertently. With Kubernetes, you can define the different namespaces for teams and use Resource Quotas to enforce quotas on these namespaces.
For instance, you may have a Kubernetes cluster that has 64 CPU units and 256 Gigabytes of RAM spread over eight nodes. You might create three namespaces — one for each of your development teams — with the resource quota of 10 CPU units and 80 Gigabytes of memory. This would allow each development team to create any number of Pods up to that limit, with some CPU and memory left in reserve.
For more information on specifying resource quotas for namespaces, refer to the Resource Quotas section of the Kubernetes documentation.
The importance of monitoring Kubernetes
Setting requests and limits on both containers and namespaces can go a long way to ensure yourKubernetes cluster does not run out of resources. Monitoring, however, still plays an important role in maintaining the health of individual services, as well as the overall health of your cluster.
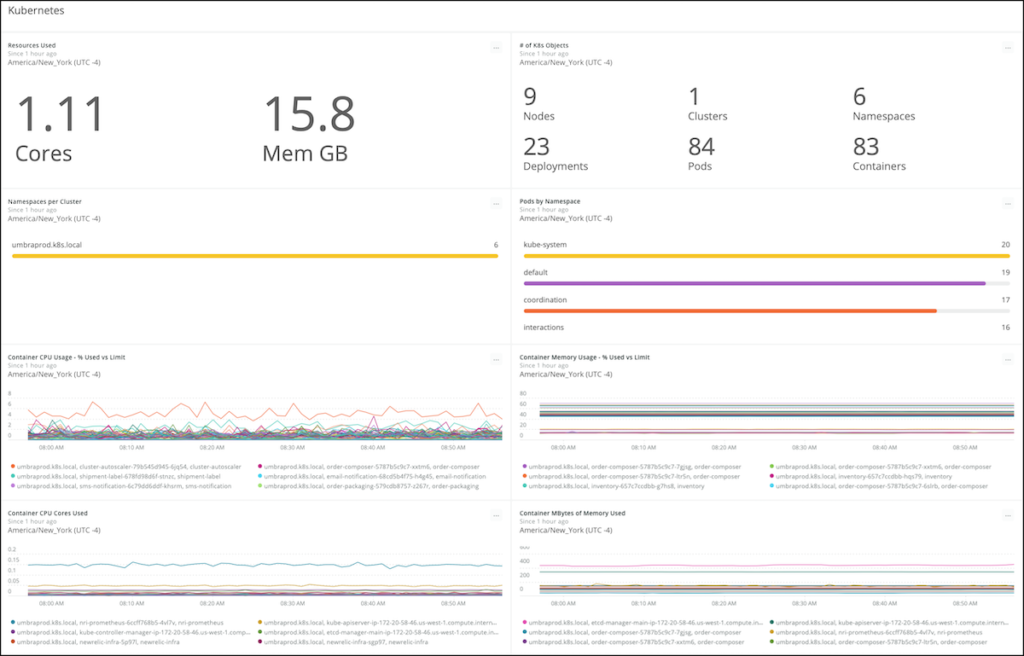
When you have large clusters with many services running within Kubernetes pods, health and error monitoring can be difficult. The New Relic platform offers an easy way to monitor your Kubernetes cluster and the services running within it. It helps you make sure that requests and limits you are setting at the container and across the cluster are appropriate.

Having a good understanding of how Kubernetes handles CPU and memory resources, as well as enabling configuration to manage these resources, is critical to ensure your Kubernetes clusters have enough capacity at all times. As we've seen, setting CPU and memory requests and limits is easy—and now you know how to do it. By adding a layer of monitoring, you will go a long way to ensuring that Pods are not fighting for resources on your cluster.
Best practices for Kubernetes requests and limits
Implementing Kubernetes requests and limits effectively is crucial for optimizing resource utilization and ensuring the stability and reliability of your applications. Here are some best practices to consider:
-
Understand your application requirements:
Analyze your application's resource needs by profiling CPU and memory usage under different workloads. This understanding will help you set accurate requests and limits.
-
Set requests conservatively; limits realistically:
Be conservative when setting requests to ensure the Kubernetes scheduler can find suitable nodes for your pods. On the other hand, set limits based on your application's actual resource requirements to avoid performance degradation.
-
Use resource quotas:
Implement Kubernetes resource quotas to limit the aggregate resource usage of a namespace. This helps prevent resource exhaustion and ensures fair resource distribution among applications in a multi-tenant cluster.
-
Regularly monitor resource usage:
Utilize monitoring tools to keep track of your pods' resource consumption. Identify any anomalies or spikes in resource usage and adjust Requests and Limits accordingly.
-
Avoid overcommitting resources:
Overcommitting resources, such as setting high limits without accurate estimations, can lead to performance issues. Strike a balance between optimal resource allocation and avoiding overcommitment.
-
Educate your team:
Ensure that your development and operations teams are well-versed in the importance of requests and limits. Educate them on how these configurations impact pod scheduling, resource utilization, and cluster management and health.
Ready for a deep dive into Kubernetes monitoring? Check out A Complete Introduction to Monitoring Kubernetes with New Relic.
New Relic is a proud Platinum Sponsor at this year's KubeCon + CloudNativeCon Virtual Conference taking place on November 17-20. Stop by our virtual booth located in the Platinum Sponsor Hall and chat with one of our developer experts.
The views expressed on this blog are those of the author and do not necessarily reflect the views of New Relic. Any solutions offered by the author are environment-specific and not part of the commercial solutions or support offered by New Relic. Please join us exclusively at the Explorers Hub (discuss.newrelic.com) for questions and support related to this blog post. This blog may contain links to content on third-party sites. By providing such links, New Relic does not adopt, guarantee, approve or endorse the information, views or products available on such sites.


