Enterprise companies built on modern distributed architectures usually have a proliferation of hosts on which their applications run. Such teams use automation tools, like Ansible, to provide seamless deployments, especially at scale. This includes automating all parts of the application stack—from provisioning the underlying containers or VMs to deploying any monitoring agents alongside the application code.
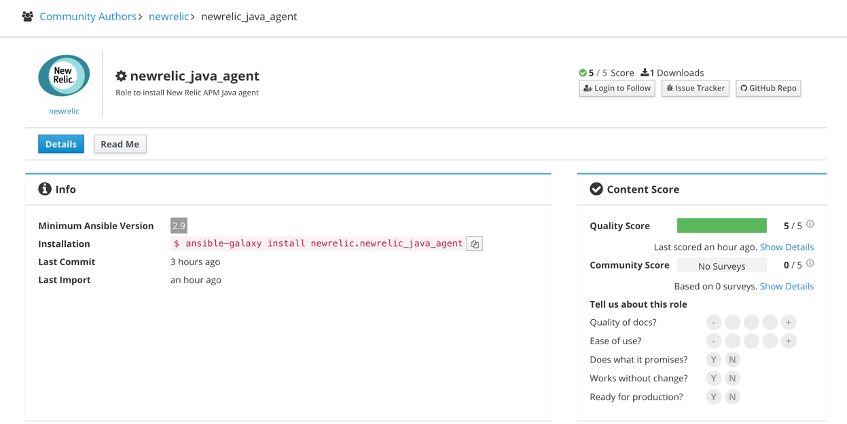
With New Relic’s Ansible role, now available on Ansible Galaxy, you can now deploy, configure, and update New Relic Java agents running on common application servers and frameworks including Apache Tomcat, Eclipse Jetty, WildFly, and Spring Boot.
What is an Ansible role?
In Ansible, roles allow you to group related tasks and all their variables and dependencies into a single, self-contained, portable entity. Grouping your tasks into roles is one of the best ways to maximize the power of Ansible’s modularity and reusability, as organizing things into roles lets you reuse common configuration steps between different types of servers.
Roles provide a standardized file-and-directory structure that lets Ansible automatically load variables, tasks, handlers, and default values into your Ansible playbooks, which are “repeatable, reusable, simple configuration management and multi-machine deployment system(s)” for deploying applications.
Don’t miss it: Learn more about Ansible roles and best practices.
Deploy the Java agent with the New Relic Ansible role
You can import the New Relic Ansible role through the Ansible Galaxy CLI. We support the majority of configuration paths within the role and also give you the option to include your own configuration file.
Use this role to update agents across specified host groups and to provide automatic backups of your existing configuration files in case any issues arise.
For full requirements, configuration details, and other information, see the New Relic GitHub repo.
Step 1: Download and install the role
From the Ansible Galaxy CLI, run:
ansible-galaxy install newrelic.newrelic_java_agent
Step 2: Create your playbook and inventory file
Below you’ll find a sample playbook and sample inventory file that contains the basic configuration items needed to use the role. For more details and further configuration options, see the repo.
The Ansible role uses variables for two purposes: role configuration and agent configuration.
Role configuration variables describe how your hosts are set up, so that the role can install the agent files to the right location and set up your Java environment to run the agent. The following role configuration variables are required for your playbook to run:
server_type: Web server used by your application. Possible values are: tomcat, jetty, and wildfly (standalone mode only).server_root: Location of the web server on the host. The agent's JAR, configuration, and log files will live in a subdirectory of this directory.jvm_conf_file: Path of the web server configuration file to reference the New Relic Java agent. For Tomcat, for instance, it'ssetenv.sh. If it doesn't exist, the file will be created.server_user/server_group: User and group under which the web server runs. Used to set the ownership of the jar andnewrelic.ymlfiles.service_name: Service name under which the web server runs. Used by Ansible to restart the web server after the agent is installed. (Not required if the optionalrestart_web_servervariable is set tofalse)
Agent configuration variables can be set globally in your playbook, or per host or per group in your inventory file. These variables are used to create the newrelic.yml file that the Java agent uses to determine its configuration. Agent configuration goes in the nr_java_agent_config dictionary and is added to the Java agent's config file, newrelic.yml. The repo contains a list of advanced configuration settings, but the following agent configuration variables are required for your playbook to run:
license_key: This is your New Relic license key.app_name: Name of the application being instrumented. For more details, see the New Relic documentation on app naming.
The following sample playbook and inventory file contain the basic configuration items needed to use the role:
Sample playbook (agent_install.yml)
- hosts: linux_java_servers

  vars:

    nr_java_agent_config:

      license_key: YOUR_LICENSE_KEY

      app_name: Your App Name

      server_type: tomcat

      server_root: /var/lib/tomcat8

      jvm_conf_file: /usr/share/tomcat8/bin/setenv.sh

      server_user: tomcat8

      server_group: tomcat8

      service_name: tomcat8

      restart_web_server: true

  tasks:

   - include_role:

       name: newrelic_java_agent
Sample inventory file (inventory.yml)
linux_java_servers: # host group

  vars:

    # Ansible configuration can go here

    ansible_user: ubuntu

    # Also configuration specific to this role, to apply to all hosts

    server_type: tomcat


  hosts:

    java_server_one:

      ansible_host: 127.0.40.1

      # Host-specific agent configuration goes here

      nr_java_agent_host_config:

        # Overrides app_name set in playbook

        app_name: Example App


    java_server_two:

      ansible_host: 127.0.40.2

      # app_name set in playbook will be used
Step 3: Execute your playbook
You can now run your playbook to deploy the Java APM agent throughout your host inventory using Ansible. To do so, run the following command:
ansible-playbook -i examples/inventory.yml examples/agent_install.yml
Supporting our open source mission
At New Relic, we’ve made a commitment to support open source initiatives throughout the developer community. Projects like our support for OpenTelemetry provide a way for customers to derive additional value from the New Relic platform without being solely dependent on proprietary New Relic functionality. With the release of this Ansible role, we’re extending this open source commitment to our deployment, onboarding, and updating processes.
The New Relic Ansible role is an open source contribution under the Apache 2.0 license. We welcome requests for improvements. Keep in mind that when you submit your pull request, you’ll need to sign our CLA. If you’d like to execute our corporate CLA, or if you have any questions, drop us an email.
Die in diesem Blog geäußerten Ansichten sind die des Autors und spiegeln nicht unbedingt die Ansichten von New Relic wider. Alle vom Autor angebotenen Lösungen sind umgebungsspezifisch und nicht Teil der kommerziellen Lösungen oder des Supports von New Relic. Bitte besuchen Sie uns exklusiv im Explorers Hub (discuss.newrelic.com) für Fragen und Unterstützung zu diesem Blogbeitrag. Dieser Blog kann Links zu Inhalten auf Websites Dritter enthalten. Durch die Bereitstellung solcher Links übernimmt, garantiert, genehmigt oder billigt New Relic die auf diesen Websites verfügbaren Informationen, Ansichten oder Produkte nicht.


