近年はセキュリティリスクの増大に伴い、パスワードだけではなく複数の要素で認証するWebサービスが増加しています。
Synthetic Monitoringは基本的な設定でも多岐にわたるチェックが可能ですが、全ての環境を網羅するにはより踏み込んだ活用が必要になります。
本記事ではセキュリティが強化されたサイトに対し、簡単なサンプルコードをもとに定期的に外形監視を実行する方法を解説します。
多要素認証とは?
まずは、多要素認証についての簡単に振り返ってみましょう。
wikipediaより:

多要素認証(たようそにんしょう、英語: Multi-Factor Authentication、英: MFA)は、アクセス権限を得るのに必要な本人確認のための複数の種類の要素(証拠)をユーザーに要求する認証方式である。
ID/パスワードだけではなく、Google AuthenticatorをはじめとするスマートフォンアプリやSMS、メールなどに対し発行されたトークンと合わせて認証する形がよく知られています。
本記事では、スマートフォンアプリなどで使用される複数桁の数字で構成されるトークンを利用した設定について解説します。
※本記事内に記載されているサンプルコードは運用の仕方によってはサービスに影響を及ぼす可能性があります。ご自身で提供されているサービスもしくは、監視・管理を委託されているなど管理する権限のあるサービスに限って実施してください。また、サービスの仕様によっては機械的なログインが繰り返し行われたり複数回ログインに失敗するとサービスから遮断されるといったことが起こり得ます。ご自身のアカウントがロックされたりしないよう、十分にご留意ください。
Syntheticsにおける多要素認証の扱い
Synthetic monitoringでは複数のタイプのmonitorを作成し、外型監視を行うことができます。そのなかでもScripted Browserではscriptを書くことでより環境に合った監視を柔軟に作成することができます。本記事ではScripted BrowseでOTPAuthパッケージを使い多要素認証環境の外型監視を実現しています。
設定例
多要素認証によるトークンの取得方法はGitHubにてサンプルが公開されています。
https://github.com/newrelic/quickstarts-synthetics-library/blob/main/library/2FAOrMFA/script.js
設定例では実際にサンプルコードを組み込み、ID/パスワード/多要素認証が設定されたページで認証に成功するまでのシナリオを解説します。
var otpauth = require('otpauth');

// The secret is the value obtained while setting up 2FA/MFA for your user and choosing the Can't scan the QR code option.
// Capture this key and store it in a Secure Credential for use during monitor execution.
var secret = $secure.TESTOKTAMFA;

// This encoding and algorithm combination is used for Google Authenticator or Okta based TOTP.
let totp = new otpauth.TOTP({
  algorithm: 'SHA1',
  digits: 6,
  period: 30,
  secret: secret
})

// The scripted browser logic to navigate to the MFA screen would be located here. Find the object and then use this as the input to sendKeys.
// Since this is time based, send the output to sendKeys directly instead of storing this in a variable at the top of your script.
// Example: el.sendKeys(totp.generate()) where el is the element.
// This quickstart logs out the token instead of sending it to an element or as input to an API test.
let token = totp.generate();
console.log(token);
1. アプリケーション用の秘密鍵を取得する
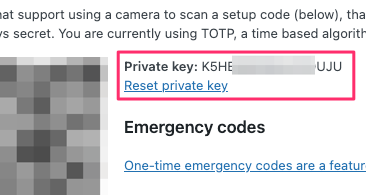
OTPAuthは認証アプリの代替として動作しますが、複数桁のコードを生成させるためには秘密鍵が必要になります。 ここでは監視対象のサイトより秘密鍵を取得します。 ※セキュリティ上問題ないようであれば、検証のためご自身のデバイスを登録しておきましょう。

2. SyntheticsのSecure Credentialsに認証情報を保存する
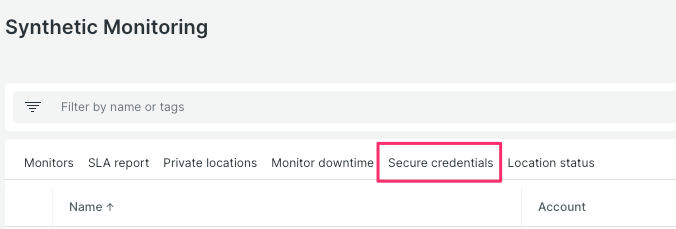
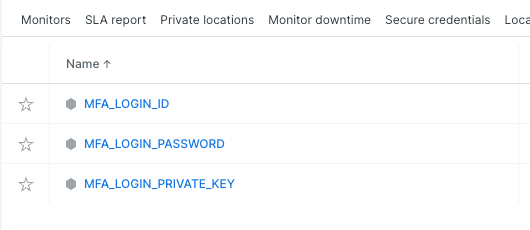
Secure credentialより、画面右上のボタンより「Create secure credential」を選択してサイトログイン用のID/Passと手順1で取得した秘密鍵をそれぞれSecure Credentialsに登録します。


3. Scripted browser Monitorを作成する
User flow / functionalityを選択し、Scripted browserを作成します。

4. Monitorの設定を行う
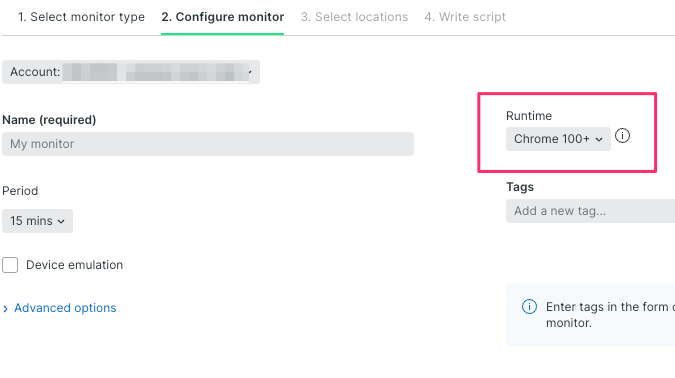
OTPAuthパッケージを利用する要件として、Chrome 100以上、Node 16.10.0以上が要求されます。 Runtimeは忘れずに Chrome 100+ を選択しましょう。 Locationはご利用される方の環境に合わせてご選択ください。

5. Scriptを書く
それでは実際にscriptを書いてみましょう。 scriptの構成としては下記の流れとなります。
- 対象サイトを開く
- ログインIDを入力
- パスワードを入力
- 決定ボタンを押しログイン
- 多要素認証トークン要求画面への遷移を待つ
- 多要素認証トークン要求画面でトークンを入力
- 決定ボタンを押してログイン
- マイページへの遷移を待つ
手順5では実際に秘密鍵をもとにTOTP (Time-based, One-Time Password) を利用したトークンを生成、入力ボックスにトークンを入力しています。
※Time-basedとありますように、scriptの先頭部分でトークンを取得すると実行時間が長引いた際にトークンが失効する場合があります。
できる限り、トークンを要求される画面に近い場面でトークンを生成しましょう。
/**
 * Feel free to explore, or check out the full documentation
 * https://docs.newrelic.com/docs/synthetics/new-relic-synthetics/scripting-monitors/writing-scripted-browsers
 * for details.
 */

var assert = require('assert');
var DefaultTimeout = 30000;
var otpauth = require('otpauth');

var secret = $secure.MFA_LOGIN_PRIVATE_KEY

let totp = new otpauth.TOTP({
  algorithm: 'SHA1',
  digits: 6,
  period: 30,
  secret: secret
})

console.log('Step 1');
console.log('Navigating to "https://your-testisite/"');

$webDriver.get("https://your-testsite/admin")
.then(function() {
    console.log('Step 2');
    console.log('Entering secure key: "MFA_LOGIN_ID" into element with selector: <user_login>');
    $webDriver.findElement($selenium.By.id("user_login")).sendKeys($secure.MFA_LOGIN_ID);
})
.then(function() {
    console.log('Step 3');
    console.log('Entering secure key: "MFA_LOGIN_PASSWORD" into element with selector: <user_pass>');
    $webDriver.findElement($selenium.By.id("user_pass")).sendKeys($secure.MFA_LOGIN_PASSWORD);
})
.then(function() {
    console.log('Step 4');
    console.log('Clicking on element with selector: <login-submit>');
    $webDriver.findElement($selenium.By.id("login-submit")).click();
})
.then(function() {
    console.log('Step 5');
    console.log('Wait MFA auth Page: https://your-testsite/admin/mfa/confirm');
    $webDriver.wait($selenium.until.urlIs("https://your-testsite/admin/mfa/confirm"),DefaultTimeout);
})
.then(function() {
    console.log('Step 6');
    console.log('Entering token: token into element with selector: <mfa_token>');
    let token = totp.generate()
    $webDriver.findElement($selenium.By.id("mfa_token")).sendKeys($token);
})
.then(function() {
    console.log('Step 7');
    console.log('Clicking on element with selector: <token-submit>');
    $webDriver.findElement($selenium.By.id("token-submit")).click();
})
.then(function() {
    console.log('Step 8');
    console.log('Wait My Page: https://your-testsite/my/page');
    $webDriver.wait($selenium.until.urlIs("https://your-testsite/my/page"),DefaultTimeout);
});
まとめ
Scripted browserではパッケージを利用た認証方法の追加をはじめとして、さまざまなモニタリングを構成できます。
また、今回ご紹介させていただきました多要素認証対応の他にも様々なサンプルが公開されています。
Simple browserなどSyntheticの他の機能では実現が難しい環境などでご利用にお悩みでしたら、より柔軟に設定可能なScripted Browser利用の足がかりになりますと幸いです。
本ブログに掲載されている見解は著者に所属するものであり、必ずしも New Relic 株式会社の公式見解であるわけではありません。また、本ブログには、外部サイトにアクセスするリンクが含まれる場合があります。それらリンク先の内容について、New Relic がいかなる保証も提供することはありません。


