
Today we’re announcing a new click-to-parse capability for log management, which allows you to easily select any string from your log file, then parse out repeatable values for alpha-numeric input, reducing manual entry and time to create queries. With a single click you can parse any variables from string attributes without writing any additional script. We’ll walk you through an example below, which you can see in action by watching this video.
For context, ever since my then 12-year-old son compelled me to watch the popular anime live-action “One Piece,” I began to see the analogy between “finding the One Piece” and a day in the life of Dev/Ops engineers tasked with working with logs. In the realm of IT, log files are a valuable source of information that record anything that happens in your environment– events, errors, transactions, or even breaches. Just as in the aforementioned series (or any pirate-themed children’s story, actually) the crew attempts to navigate the best route to find the treasure, DevOps, security, and compliance professionals attempt to build the most effective queries by parsing data strings to successfully navigate through the vast lines of log data and find valuable insights. New Relic log management already parses the majority of valuable information automatically, but sometimes we find the need to create additional rules for deeper analysis, which can of course be very time-consuming and prone to errors due to the repetitive nature of manual entry. And that’s precisely why we added this click-to-parse feature, so you can now easily parse out values from any string attribute into your log table for alpha-numeric input.
New Relic click-to-parse automates and streamlines the end-to-end query process to increase productivity and reduce the risk of errors. This capability is unique in that other observability platforms in the market (that is, Dynatrace, AppDynamics, Datadog, etc.) have no comparable capability and rely on manual input. And as we can see, the attempts from other pure-play log management vendors fall short in several areas:
- Splunk requires additional steps, including an “add-on” to configure. New Relic’s approach is pre-configured for users to get immediate value through increased productivity.
- Sumo Logic is only available for JSON logs, the New Relic solution offers the click-to-parse productivity hack for any log format ingested.
How to use click-to-parse
So, now that we understand the value of click-to-parse, we invite you to grab a gum-gum fruit, step aboard the Going Merry, and take a voyage with us to see how easy it is to get started in just two simple steps.
Step 1: Select attribute value to parse
In this example, we have a log message that with a string representing a shopping cart that contains an item name, ID and unit price. The values of these three attributes vary from one log line to the next, and I want to extract them via anchor parse.
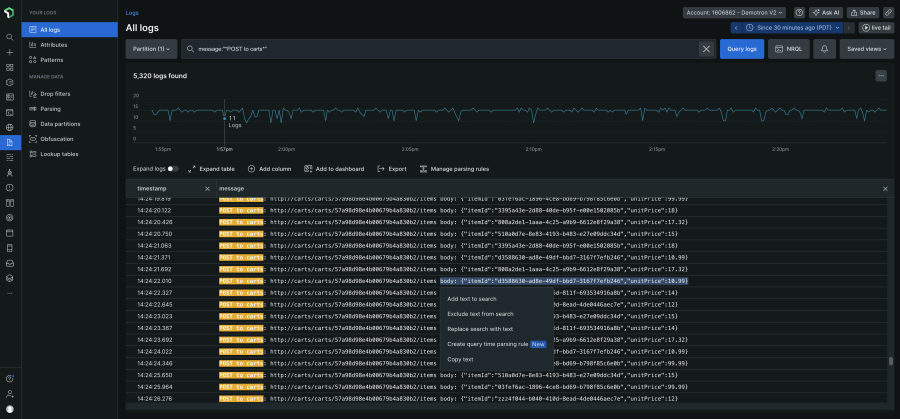
Create query time parsing rule
There are two steps to define an anchor parse with the New Relic Query Language (NRQL) expression using click-to-parse. The first step is to select the text that you want to parse. We’ll select the text in this log line right from the Logs UI. Here, we’re clicking on the beginning of the text on the left-hand side, and dragging the mouse pointer to the end of the string that I want to select. As the context menu appears, I click Create query time parsing rule.
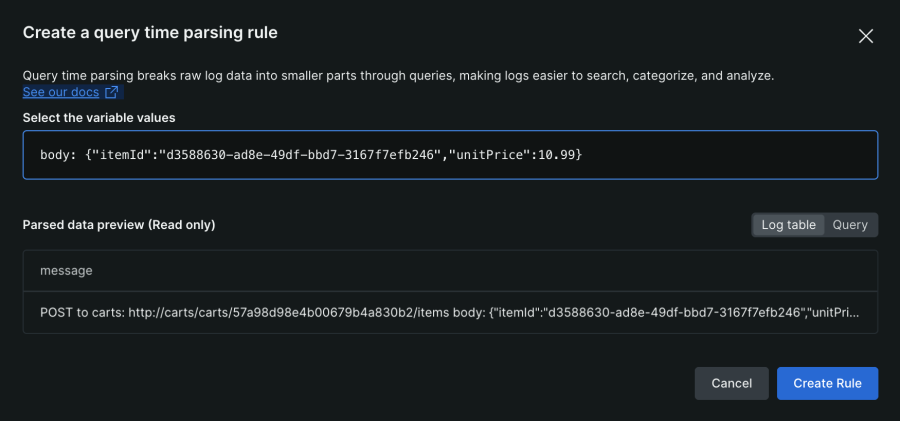
A dialog box containing the text that I just selected pops up.
Step 2: Define the parsing expression
Now we’ll need to identify the values to extract. In this example, I'm going to select the "itemId" value by simply highlighting it.
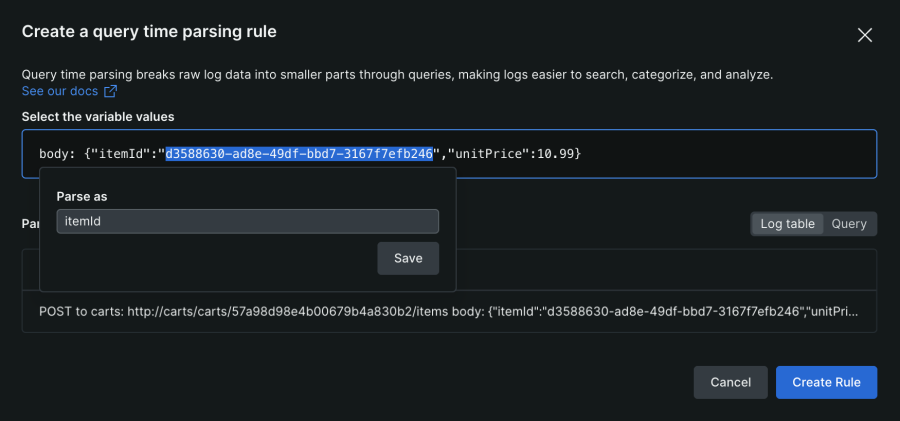
Defining parsing expression
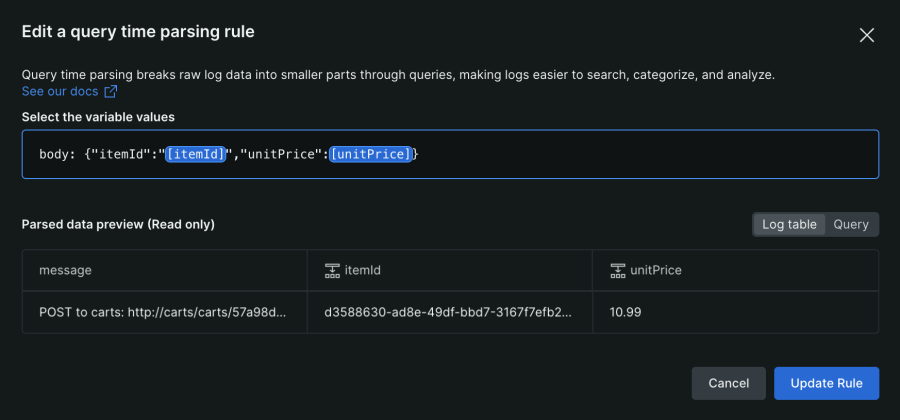
Above, we see that the numeric string beginning with d35 has been highlighted by clicking on the first character of the text and dragging the mouse across to the last character. When the dialog box appears we need to give the attribute a name, which we’ll call itemid, and then click Save.
The attribute has been quickly and easily defined and will automatically be substituted into the next string.
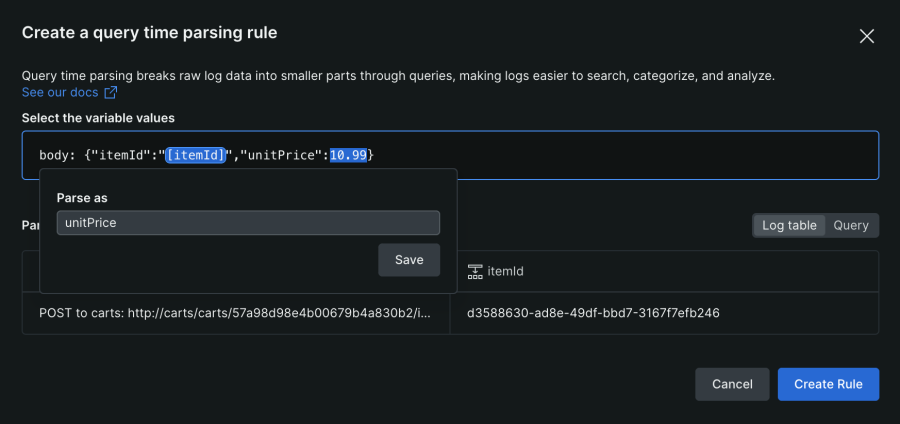
Defining the attribute
We’ll repeat the same process for other attributes by highlighting the text and giving the attribute a name, which in this example we’ll call unitprice
Naming the attribute
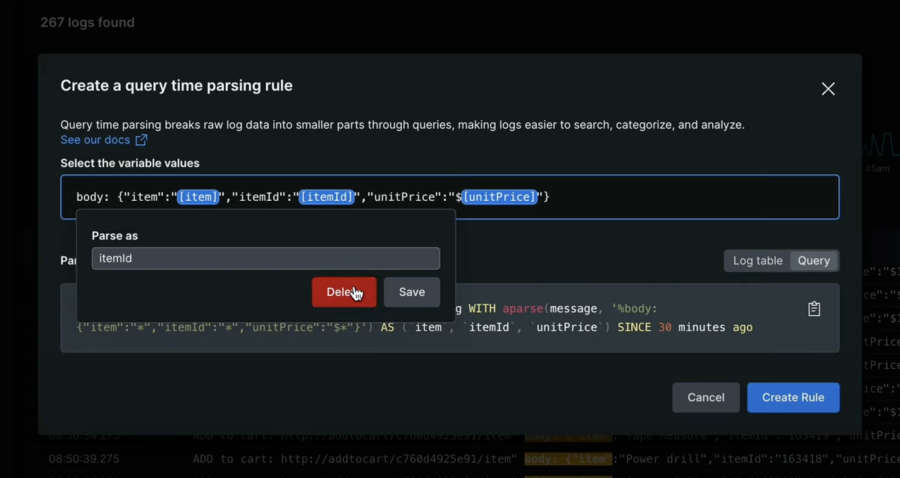
We can check the generated anchor parse NRQL expression by clicking the Query selector to switch to the Query view, and if there are any mistakes in highlighting the text or naming the attribute, we can make corrections on the fly by selecting the attribute, deleting it, and defining it again (as shown in the screenshot above).
Once everything is defined, we click the Create Rule button to save the anchor parse expression.
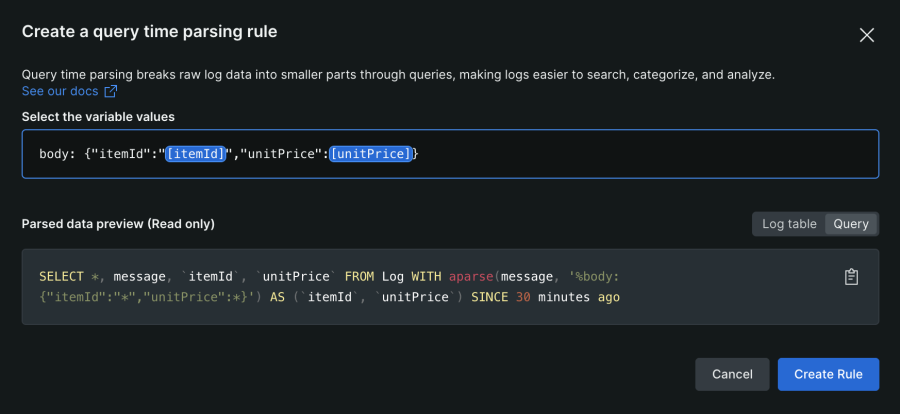
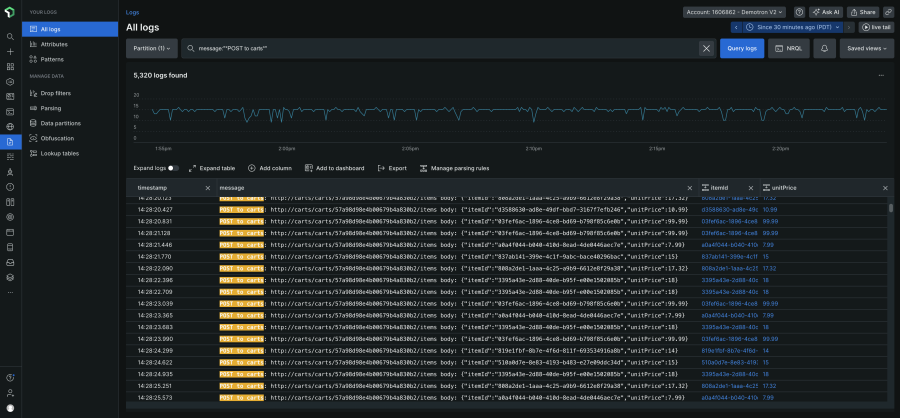
As shown above, the two new attributes have been added.
Managing query time parsing rules
To change the anchor parse definition, we can select a specific rule from the list and click on edit.
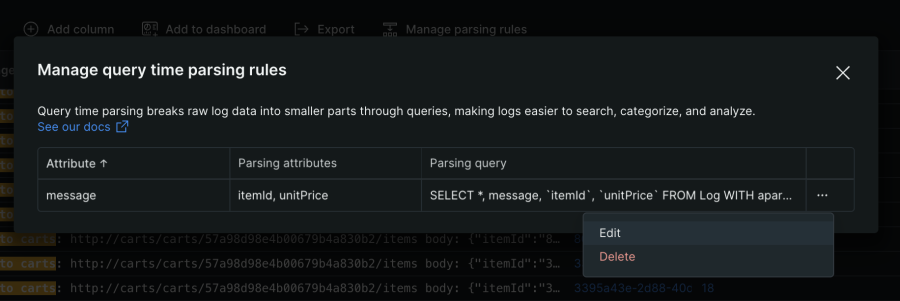
Next, we simply click on the attribute we wish to change, such as price, then in the resulting pop-up we'll rename it to unitPrice and click save.
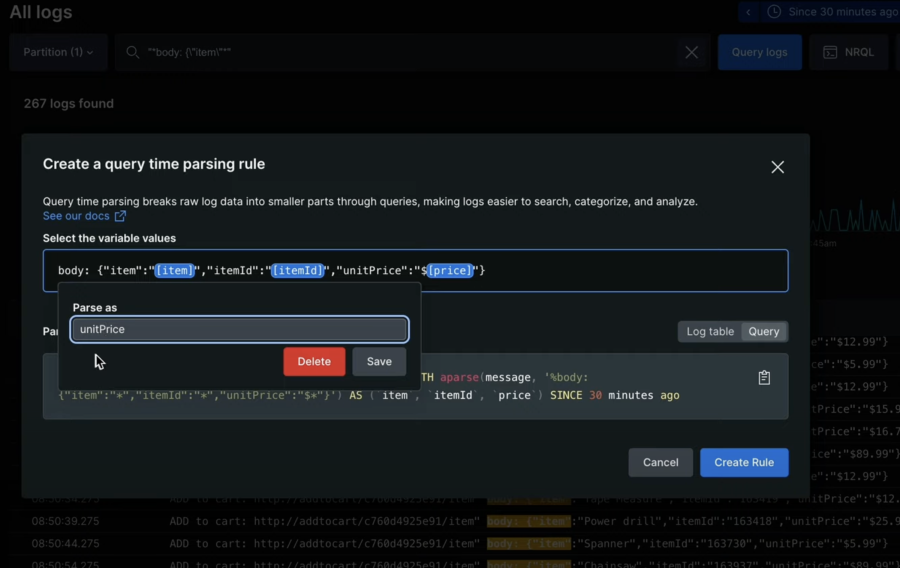
We follow the same process if we wish to delete an attribute, such as itemId; simply click on the attribute the Delete from the resulting pop=up.
Finally, we click Create Rule and our new columns have been automatically added to the logs table.
Saving the anchor parse expression
Die in diesem Blog geäußerten Ansichten sind die des Autors und spiegeln nicht unbedingt die Ansichten von New Relic wider. Alle vom Autor angebotenen Lösungen sind umgebungsspezifisch und nicht Teil der kommerziellen Lösungen oder des Supports von New Relic. Bitte besuchen Sie uns exklusiv im Explorers Hub (discuss.newrelic.com) für Fragen und Unterstützung zu diesem Blogbeitrag. Dieser Blog kann Links zu Inhalten auf Websites Dritter enthalten. Durch die Bereitstellung solcher Links übernimmt, garantiert, genehmigt oder billigt New Relic die auf diesen Websites verfügbaren Informationen, Ansichten oder Produkte nicht.


