Netlify helps developers ship faster by simplifying build and deployment workflows and making it easier to scale applications. We want to empower developers and make their jobs easier so we’re big fans of Netlify here at New Relic.
We’ve written about using Netlify post-processing to monitor Jamstack application performance with the New Relic Browser Agent. Now we’ve made things even easier with the New Relic Netlify Plugin and the New Relic Netlify quickstart.
We built the plugin for developers who want to know how their deploys are affecting site performance for users. With the plugin, you can:
- Automatically install the browser monitoring agent and notify New Relic One each time a build event occurs in Netlify. With New Relic One, you get critical insights via real-user monitoring (RUM) into the performance of your Jamstack application.
- Understand how each deployment affects your site’s performance metrics in production.
- Measure your site's Google Core Web Vitals, including largest contentful paint, first input delay, and cumulative layout shift.
- Quickly discover and fix errors before they impact your users.
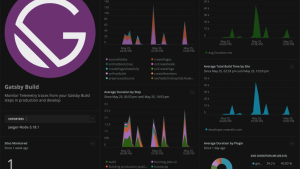
- Explore your data using our custom-built dashboards, and receive notifications when there are issues with your Netlify site.
Installing the New Relic Netlify Plugin
To install the plugin, log into your New Relic account (or sign up for a free account), then create a New Relic ingest license key and a New Relic browser ingest license key.
Installing via the Netlify UI
In your Netlify account, navigate to the plugins directory and then search for New Relic. Select Install and then choose which Netlify sites will use the plugin.
Next, you need to configure the plugin using environment variables. Navigate to your Site settings > Build and deploy > Environment and create the following environment variables:
NEWRELIC_ACCOUNT_ID: Your New Relic Account ID.NEWRELIC_INGEST_LICENSE_KEY: The ingest license key you created earlier.NEWRELIC_BROWSER_LICENSE_KEY: The browser ingest license key your created earlier.NEWRELIC_APP_ID: Your New Relic Browser App ID.ENABLE_BROWSER_MONITORING: Set this to true.
See the plugin documentation for a complete list of available configuration variables and their values.
Installing via your netlify.toml file
You can also install the Netlify plugin by adding this code to your netlify.toml file:
[[plugins]]
package = "@newrelic/netlify-plugin"

  [plugins.inputs]
    newrelicAccountId = "123456"
    newrelicLicenseKey = "12345678901234567890"
    newrelicBrowserLicenseKey = "ABCD-0987654321"
    newrelicAppId = "123456789"
    enableBrowserMonitoring = true
Replace the values for newrelicAccountId, newrelicLicenseKey, newrelicBrowserLicenseKey, and newrelicAppId with your New Relic account ID, the ingest license and browser ingest license keys you created earlier in this post, and your New Relic browser app ID.
There may be times when you want to specify which plugins to use in your netlify.toml, but you don’t want to expose your license keys. (For example, you should never expose your private keys on GitHub.) In this case, you can still include the plugin in your netlify.toml file and configure it using environment variables and the Netlify UI as outlined in the previous section.
See the plugin documentation for a complete list of available configuration variables and their values.
Viewing and setting alerts on Netlify performance in New Relic One
Log in to your New Relic account and go to the Instant Observability quickstarts directory. Search for Netlify, select the Netlify logo to view the quickstart overview page, and then select Install quickstart. Follow the on-screen instructions to complete the installation.
The quickstart creates several alerts for you. These alerts are disabled by default. Navigate to your Netlify Quickstart alert policy page within Alerts & AI > Alert Conditions and enable the alerts you want to use.
That’s it! You now have the New Relic Netlify Plugin and the New Relic Netlify quickstart installed and configured. Check out your new Netlify dashboards and alerts, and customize them to your unique requirements as needed.
Be sure to check the plugin documentation to learn about additional features and configuration options not discussed in this post.
Próximos pasos
If you don't have a New Relic One account yet, sign up. Your free account includes 100 GB/month of free data ingest, one free full-access user, and unlimited free basic users.
Las opiniones expresadas en este blog son las del autor y no reflejan necesariamente las opiniones de New Relic. Todas las soluciones ofrecidas por el autor son específicas del entorno y no forman parte de las soluciones comerciales o el soporte ofrecido por New Relic. Únase a nosotros exclusivamente en Explorers Hub ( discus.newrelic.com ) para preguntas y asistencia relacionada con esta publicación de blog. Este blog puede contener enlaces a contenido de sitios de terceros. Al proporcionar dichos enlaces, New Relic no adopta, garantiza, aprueba ni respalda la información, las vistas o los productos disponibles en dichos sitios.


