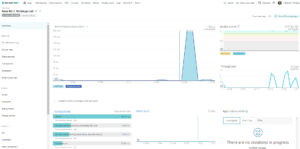
New Relic APMでデプロイメントを記録できることは以前の記事でもご紹介しました。
https://blog.newrelic.co.jp/devops/deployment-tracking/
REST API形式ですのでスクリプトに埋め込むことも比較的容易です。一方、最近ではデプロイメントワークフローとして利用できるサービスも増えています。その中の一つであるGitHub Actionsで使えるデプロイメント記録アクションをNew Relicでは提供しています。
https://github.com/marketplace/actions/new-relic-application-deployment-marker
本日はこちらの使い方を紹介したいと思います。
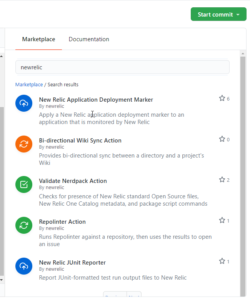
まず、GitHub Actionsの定義ファイルを編集します。GitHub上で編集するとこのようにNew RelicがActionの一覧に表示されます。
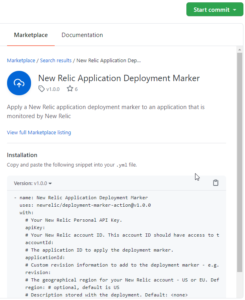
選択するとテンプレートが表示されるので、コピー&ペーストします。ローカルで編集している場合はサンプルの定義ファイルを使います。
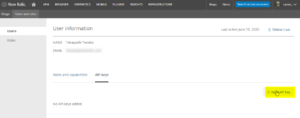
指定が必要なパラメーターは、パーソナルキー、アカウントID、アプリケーションIDの3つです。パーソナルキーは、REST API形式でデプロイメントを記録するときに必要なREST API キーとは異なるので注意してください。パーソナルキーは、New Relicの画面左上のAccount SettingsからUser and Rolesを開き、ユーザー一覧を表示します。
取得するユーザーをクリックして表示される画面でAPIキーを作成します。
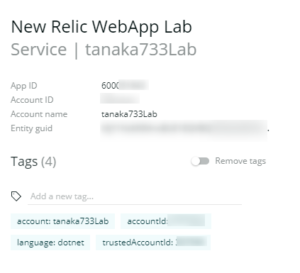
アカウントIDとアプリケーションIDについては以前はURLに含まれていたのに、New Relic OneベースのUIではURLが複雑になったためすぐにわからないという方もいるかもしれません。そんな場合はAPMのアプリケーションの画面でアプリケーション名の横のiアイコンをクリックしてください。
すると画面の右側にこのような情報が表示され、必要な情報をコピーできます。
これらの情報はGitHub ActionsのSecretに格納し、コミット情報などを変数から取得すると、例えばこのような定義になります。
- name: New Relic Application Deployment Marker
uses: newrelic/deployment-marker-action@v1.0.0
with:
apiKey: ${{secrets.NewRelicPersonalAPIKey}}
accountId: ${{secrets.NewRelicAccountID}}
applicationId: ${{secrets.NewRelicApplicationID}}
revision: ${{github.sha}}
description: ${{github.event.head_commit.message}}
あとはこの定義を含んだGitHub Actionを実行するとデプロイメントをいままで通りに記録できます。
なお、このGitHub Actionはcontainer actionを利用しているためLinux OSでしか動きません。Windowsにも対応してほしい、ほかのCI/CDサービスにも同じものを提供してほしいなどありましたら、ぜひご意見をお寄せください。
The views expressed on this blog are those of the author and do not necessarily reflect the views of New Relic. Any solutions offered by the author are environment-specific and not part of the commercial solutions or support offered by New Relic. Please join us exclusively at the Explorers Hub (discuss.newrelic.com) for questions and support related to this blog post. This blog may contain links to content on third-party sites. By providing such links, New Relic does not adopt, guarantee, approve or endorse the information, views or products available on such sites.
